|
||||||||||||||||||||||||||||||||||||
|
Using a perspective control lens (shift lens)John Strait
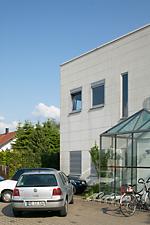
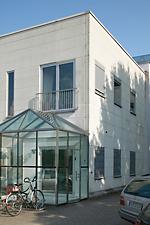
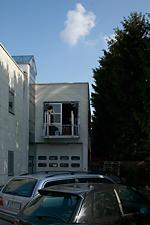
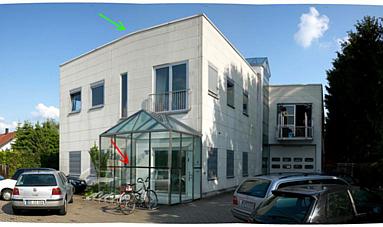
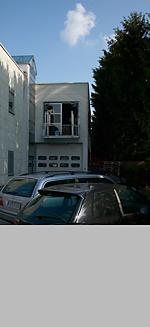
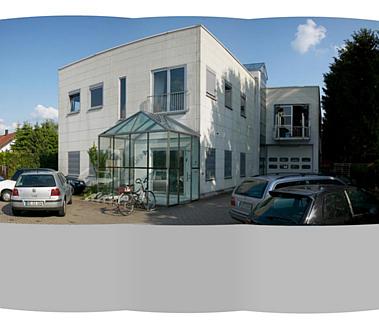
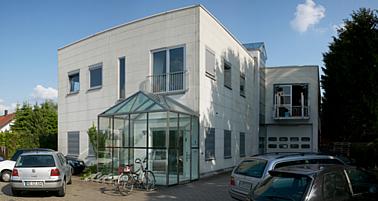
When you're taking pictures of certain types of subjects, there is a desire to tilt the camera up or down from the horizontal. For example, when you take pictures of buildings, you want to tilt the camera upward to see the tops of the buildings. Unfortunately, tilting the camera up or down from the horizontal produces images that have keystone distortion. Keystoning causes rectangles (e.g. window frames and door frames) to become trapezoids that are wider at the top (camera tilted down) or at the bottom (camera tilted up). The Panorama Factory's stitching method cannot correct for this. When images have too much keystoning, it may be impossible to create a satisfactory panorama. A special type of lens called a perspective control lens (also commonly called a shift lens) can correct this keystoning by shifting the lens up or down with respect to the camera. Shifting the lens up or down while keeping the camera level allows the camera to look up or down without creating keystone distortion. However, pictures made with a perspective control lens cannot be stitched with The Panorama Factory because it assumes that the central axis of the lens is at the center of the photo. Shifting the lens moves its center axis relative to the image. The warping that The Panorama Factory uses to make pictures fit together is symmetric above and below the center axis (and left-right also). So the warping must change when you use shift. But The Panorama Factory does not have a way to indicate the amount of shift in the center axis of the lens. This is why it does not support shift lens movement. There is a procedure you can use to stitch photos made with a perspective control lens. Although it is not very convenient, it works well and produces good results. A user of The Panorama Factory sent me the three images shown in Figure 1.
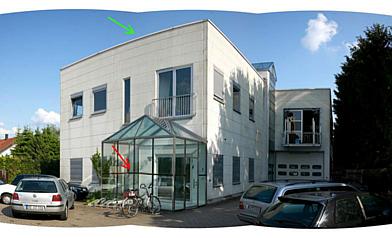
Figure 1 - Original images made with a perspective control lens He wrote to me that he had been unable to get good results with The Panorama Factory. Even though he had used a tripod and panorama head, he was still getting ghosts in the overlap regions. It is pretty easy to tell that these pictures were taken with a perspective control lens. The horizon line is below the center of the photos, but the vertical lines of the building are perfectly vertical. If he had not used a perspective control lens, the vertical lines would converge--the building would exhibit keystone distortion. These photos were made with a Canon EOS-1Ds and a 45mm perspective control lens. Automatic focal length detection The first thing I did with the photos was to stitch them with The Panorama Factory's automatic focal length detection. I set the camera type to Digital SLR and selected Canon EOS-1Ds. I selected Automatically detect focal length to see what The Panorama Factory would do with the images. To keep things simple, I did not select Correct barrel distortion or Correct brightness falloff. On Wizard Step 3, I did not select Automatically fine tune. I chose not to use fine tuning to ensure that it would not try to compensate for stitching misalignments--I wanted to see the misalignments clearly. The Panorama Factory's automatic focal length detection did the best it could to minimize alignment problems, but the lens shift confused it. It chose 78mm, showing that it was unable to find the correct value. Lines in the images did not meet smoothly in the overlap regions and there were ghost images. Manual focal length adjustment I tried the manual procedure described in Adjusting focal length and barrel correction to see whether I could find an acceptable focal length value myself. First I concentrated on the roof line in the first overlap region. To make the roof line meet smoothly, I had to use 35mm for the focal length. Figure 2 shows the result I got. The green arrow shows the roof line meeting smoothly. The green arrow shows that this focal length value does not work well at the bottom of the image.
Figure 2 - Focal length manually set to 35mm Next I concentrated on getting a smooth join in the pavement bricks at the bottom of the image. To make the bottom of the image join smoothly, I had to use 70mm for the focal length. Figure 3 shows the result I got. The red arrow shows that the images join well at the bottom of the image, but the green arrow shows that the roof line no longer meets smoothly.
Figure 3 - Focal length manually set to 70mm I concluded that there is no focal length value that can make the images join smoothly at both top and bottom. This is because The Panorama Factory performs the image warping assuming a conventional (non-perspective-control) lens. The workaround is to modify the images so that the central axis of the lens is in the center of the photo. I had to determine where the central axis of the lens is in the photos. I made two assumptions:
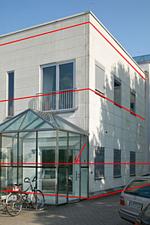
With these two assumptions, I could examine the lines of the building to determine the height of the central axis of the lens. Figure 4 shows how I did this.
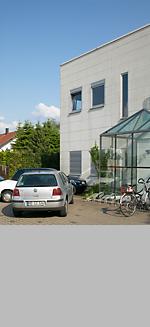
Figure 4 - Finding the central axis of the lens The red arrow shows the location of the central axis. The lines of the building above the central axis are angled upward and the lines below the central axis are angled downward. Please note that this method works only when the camera and the building are level. I increased the height of the images by adding blank space at the bottom. I added enough blank space to bring the central axis of the lens to the center of the image. To make it easier to see the adjustment, I used light gray for the blank space, but it would probably be simpler (and work better) with white. The original images were 1500 x 2252 pixels. I increased them to 1500 x 3272 pixels. Figure 5 shows the adjusted height.
Figure 5 - The central axis of the lens brought to the center of the images To stitch the images, I set the camera type to Other digital camera -- using sensor dimensions. The sensor size of the Canon EOS-1Ds is 35.9 x 23.8, but I entered 52.2 x 23.8 for the film dimensions. I changed the film dimensions because the new images are larger than ones that would be captured by the Canon EOS-1Ds. I increased the long dimension of the film size in the same proportion that I increased the images. I chose 52.2 by this calculation:
The general form of the calculation is:
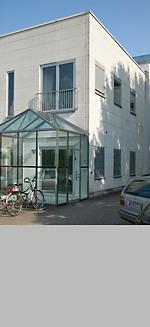
I disabled Automatically detect focal length, entered 45 for the focal length (the actual focal length of the perspective control lens) and selected I am certain of the focal length so that The Panorama Factory would not adjust the focal length. I got the result shown in Figure 6, which looks very good to me!
Figure 6 - Stitched image made using the workaround Of course you'll want to crop the image to remove the gray region at the bottom. Figure 7 shows the final image.
Figure 7 - The cropped image
Most VR viewers (QuickTime, PTViewer, etc.) assume that the central axis of the lens is in the center of the image. This means that when you create a VR image from a panorama made with a perspective control lens, you must preserve the extra space added to the image. In other words, you should not remove the gray region at the bottom as shown in Figure 7. Instead, you must preserve the entire image. Fortunately, this happens automatically if you do not adjust the image crop. Figure 8 shows the image displayed as a PTViewer panorama.
Figure 8 - The image in PTViewer I had to modify the HTML code produced by The Panorama Factory to prevent the gray area from showing. I added this line:
immediately after the line:
The tiltmin value limits the amount that the image can be tilted downward in degrees. The value should be between -90 and 90. -90 allows maximum downward tilt. I found the correct value (-12) by trial and error. Calculating the image size adjustment If your perspective control lens has an indicator telling the amount of the shift in mm, it may be possible to use this number to determine how much to to adjust the size of the images. This calculation will tell you the proportion to increase the image size:
Then you would multiply the original image size by this proportion in order to find the adjusted image size:
Although the workaround described here is not convenient, it is possible to use it to get good results from The Panorama Factory when using a perspective control lens. In order to use this workaround, you must be able to determine the location of the central axis of the lens in the images. If your perspective control lens contains an indicator telling the amount of the shift in mm, it should be possible to use this number to determine how much to to adjust the size of the images. |
|||||||||||||||||||||||||||||||||||
|
Revised: July 06, 2004 © 1999-2004 Smoky City Design, LLC and John Strait |
||||||||||||||||||||||||||||||||||||