|
|||||||||||||||||||||||||||||||||||||||||||
|
Image sharpness in stitched panoramasJohn Strait
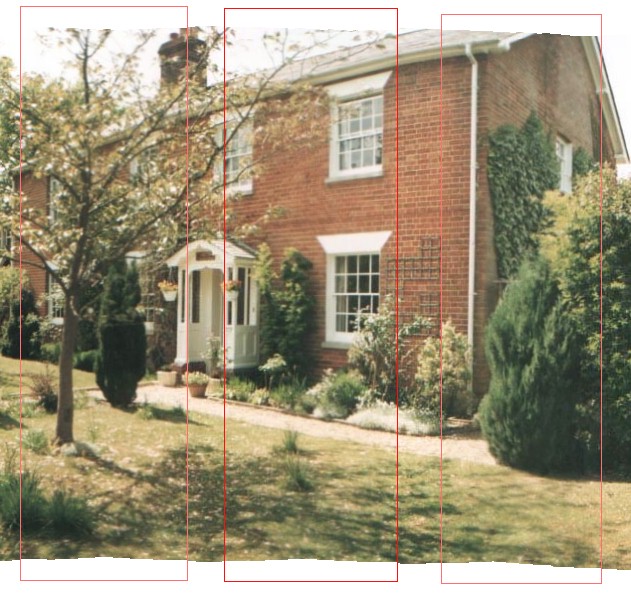
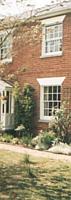
Some users have expressed concern about a perceived lack of sharpness in images produced by The Panorama Factory when compared to images from other panoramic stitchers. This article investigates the apparent lack of sharpness in The Panorama Factory images by comparing a panoramic image made with The Panorama Factory to the same image made by another panoramic stitching application. It will be seen that the apparent lack of sharpness in The Panorama Factory images is simply due to the fact that the other panoramic stitching application automatically applies a sharpening filter whereas The Panorama Factory does not. The panoramic images used in this article were made by James Rigg, the author of The Guide to Panoramas and Panoramic Photography. The panorama was made from 10 frames shot using a 35mm film camera on a tripod but without a pano-head. The images were scanned from prints.
These images are © 1999 by James Rigg. Unauthorized reproduction is a violation of copyrights. The only image processing applied to the images was to crop them and to apply the Panorama Factory's sharpening filter.
Sources of blurriness in panoramic images Making panoramic images from multiple images can be a tricky business. Attention to detail is important. There are many sources of loss of sharpness in the resulting image. First, and perhaps most significant, small misalignments between adjacent images can lead to loss of sharpness in the overlap region. There are quite a few source of misalignment:
A second source of blurriness is image resampling. A single image resampling step is unavoidable when using an ordinary camera with a flat film plane. The images must be reprojected onto the surface of a cylinder or sphere so that they will match correctly. (The Panorama Factory uses spherical projection). Each consecutive image resampling operation introduces more blur. Depending on how you make your panoramas, there may be as many as 5 resampling steps:
For an excellent discussion of how multiple generations of image resampling produces blur, see Prof. Helmut Dersch's paper Testing Interpolator Quality. Strategies for improving sharpness The Panorama Factory uses three strategies for improving image sharpness.
For more information about how to use the first strategy, see The Panorama Factory help topics Fine tune command and Fine tuning the image alignment. The last strategy, recalculating the final image in a single generation, is discussed in the article Improving the quality of multi-generation images. The remainder of this article discusses the use of a sharpening filter. Sharpening filters work by increasing contrast at edges. Figure 2 shows how a little sharpening can improve the appearance of an image.
The most common sharpening filter use a neighborhood of 3x3 pixels. For each output pixel it computes the weighted sum of the corresponding input pixel and its 8 surrounding pixels. The weights are positive for the central pixel and negative for the surrounding pixels. By arranging the weights so that their sum is 1, the overall brightness of the image is unaffects. For example, Table 1 shows the weights used by the default sharpening filter in The Panorama Factory
Table 1 - Default sharpening filter Figure 3 shows four gray rectangles unsharpened and then sharpened with The Panorama Factory's sharpening filter with the central value set to 2.0, 3.0 and 10.0.
Figure 4 shows the images from Figure 3 magnified by a factor of 3 to better show the sharpening artifacts. Notice that transitions develop a light fringe on the lighter side of the transition and a dark fringe on the darker side. This edge enhancement produces the effect of increased sharpness by highlighting edges.
These images also show what happens with excessive sharpening. What sharpening filters do to noisy images Sharpening filters have a definite downside. If your image is noisy, sharpening it will accentuate the noise. This is particularly noticable with JPEG image. Figures 5 and 6 show the effect of sharpening the gray rectangles after they have been stored in JPEG format.
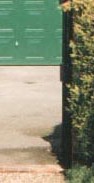
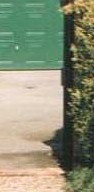
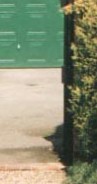
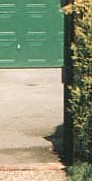
Other stitchers sharpen automatically Most other stitchers sharpen automatically to hide the blurriness introduced by the spherical or cylindrical warping. Figure 7 shows several versions of a detail section of the panorama. Click on any of the images to display a magnified version. Figure 7a shows a detail from the original, unprocessed image at the righthand end of the panorama. Figure 7b shows the output from another popular stitching application. Figure 7c shows the output from The Panorama Factory before sharpening and Figure 7d shows the result of sharpening with the central value set to 2.0. In Figures 7b and 7d you should be able to see the telltale fringing at the edge between the light colored pavement and the dark wall at the lower right. Note also the increased JPEG noise in the pavement and in the green garage door.
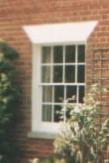
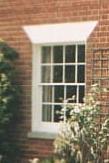
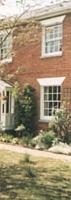
Where an image pair overlaps, panoramic stitchers blend the two images to produce a gradual transition from one image to the next. The width of the overlap is determined by the relative aligments of the images. The size and placement of the transition from one image to another may cover the entire overlap region or it may be narrower. One other popular panoramic stitching application uses a very narrow blending region, only a few tens of pixels wide. It also has a smart method for making the blend line wander so that it follows a path of "least blurriness." You can adjust the width of the blend region in The Panorama Factory to get a similar effect. For example, changing the righthand edge of the blend region as shown in Figure 8a and 8b improves the appearance of the brick between the first and second story windows.
Figure 9a shows the overlap region as produced by another panoramic stitching application. Figure 9b shows the overlap region as produced by The Panorama Factory with no sharpening. Figure 9c shows the result of sharpening with the central value set to 2.5 and Figure 9d shows the sharpened result after narrowing the blend region. These figures show that, through manual control, The Panorama Factory produces an image that is superior to the one produced by the other application, even in the blend region.
Panoramic stitching applications use a variety of strategies to control the loss of sharpness that is an unavoidable result of image processing. Most panoramic stitchers automatically sharpen the stitched image. Automatic sharpening is undesirable if you need to rescale, rotate or otherwise post process the stitched image because it cannot be reversed nor reapplied without creating artifacts. Sharpening should be applied only as the final image processing step. The Panorama Factory provides several strategies for controlling loss of sharpness. The sharpening filter is only one of them. Adjusting the blend region, fine tuning to correct misalignments and recalculating the final image in a single generation can also be used to achieve the highest quality result. The Panorama Factory provides manual control over all image processing features in order to leave the final esthetic judgement to the user. By showing how manual sharpening and manual adjustment of the blend are used to control image sharpness, this article has shown that images produced by The Panorama Factory compare very favorably with images produced by another popular panoramic image stitcher. |
||||||||||||||||||||||||||||||||||||||||||
|
Revised: April 28, 2004 © 1999-2005 Smoky City Design, LLC and John Strait |
|||||||||||||||||||||||||||||||||||||||||||