Wizard step 7/9 – Preview at low resolution
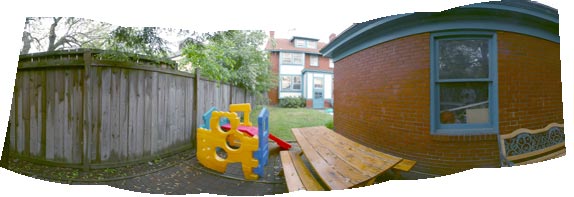
When you enter this Wizard step, The Panorama Factory displays the stitched panorama at reduced resolution. You can select the stitching resolution with the Preview resolution drop down list. The stitching resolution is independent of the displayed zoom. Stitching at low resolution is faster than stitching at full resolution and gives you a chance to decide whether the results of the previous step are satisfactory. This step is used only for manual or semi-automatic stitching. The Panorama Factory skips this step for fully automatic stitching. In document stitching, this is Wizard step 5/7.
In this step, you can click on an image in the scrolling list to highlight the overlap region. If you are not satisfied with the image alignment, return to the previous Wizard step to adjust the stitching points.
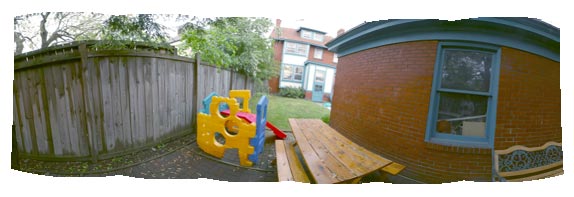
In manual stitching mode, particularly with hand held photographs, The Panorama Factory sometimes makes different choices for camera tilt than the ones you would prefer. In this situation, the pictures in your panorama may curve upward or downward.
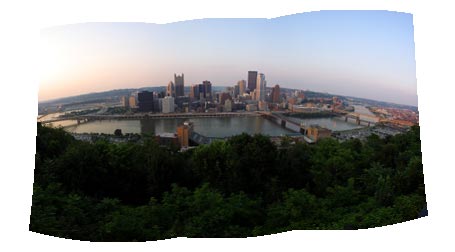
Or vertical lines in your picture may be slanted instead of straight up and down.
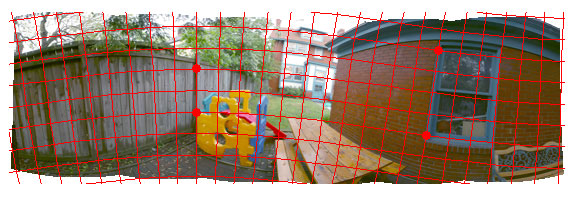
The preview step provides a warping grid to allow you to adjust the panoramic image warping. There are two ways to use the warping grid:
1. Adjust the warping grid so that it parallels the horizon.
2. Adjust the warping grid so that it parallels two different vertical lines (e.g. building walls).
The procedure for adjusting the warping grid depends upon whether you want to use the horizon method or the vertical line method.
For the horizon method, begin by clicking and dragging one of the handles (red dots) on the warping grid to a starting location on the image, for example a point on the horizon. Then click and drag another handle on the same horizontal grid line to a similar position, e.g. another point on the horizon. Finally, click and drag a third point on the same horizontal grid line to a corresponding position. You need three points to determine a line paralleling the horizon.

To adjust the warping grid to parallel two different vertical lines, begin by clicking and dragging one of the handles (red dots) on the warping grid to a starting location on one of the vertical lines. Then click and drag another handle on the same vertical grid line to a different location on that vertical line. Repeat this procedure for a second vertical line in the picture using a different starting point on the horizontal grid line.
You may adjust the positions of the handles using the keyboard arrow. To adjust a handle with the keyboard, use these steps:
1. Click a handle to select it.
2. While the stitching point is selected, use the LEFTARROW, RIGHTARROW, UPARROW and DOWNARROW keys to move it one pixel at a time. Hold the SHIFT key to move it 10 pixels at a time.
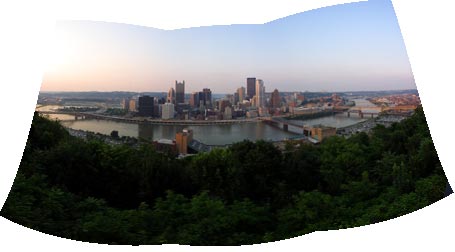
When you’re satisfied with the warping grid, press the Apply warp button to straighten the image. The Panorama Factory restitches the image to straighten the warping grid. You may need to repeat this prodedure if the results of the first warp are not perfect.
If you are not happy with the warping grid, you can reset the image to its initial state with the Apply default warp button. Or if you don’t like the way you have adjusted the grid lines, you can start over by pressing the Reset warp lines button to restore a rectangular grid without applying the warp.
When you are satisfied with the preview image, press the Next> button to advance to the next step of the Wizard.